Tutorial: Interacting with the Create
Connecting to the Create with Zephyr
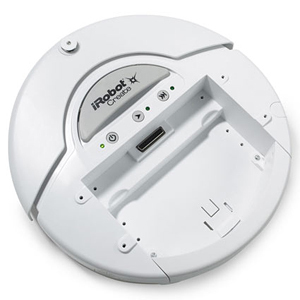
- Making the Create bluetooth aware:
- Turn off the robot
- Plug the bluetooth adapter on the robot
- Turn on the robot
- Pairing the Create bluetooth adapter with your computer (with Mac OS X):
- Make sure the bluetooth is turned on on the computer
- Click the + button
- Select the bluetooth adapter. If a pairing key is needed, it is 0000 or 1234.
- Back to the Preferences, click on the the path of the serial link created on your computer
- Connecting to the Create with Zephyr (optional):
- Download and install the application Zephyr
- Install RLPark plugins in Zephyr
- Start Zephyr
- Click on
- Choose the port corresponding to the bluetooth adapter
- You should have a view opened showing the data coming in from the Create
Creating a new Eclipse project to control the robot in Java with Zephyr
- Install Zephyr plugins in Eclipse by following Zephyr plugins installation instructions
- Create a new Eclipse project:
- and then then click
- Give a name to the project and click
- Disable the different options in the tab
- Click
- On the left, in the Package Explorer view, Eclipse has added your new project. Open it and you should see: JRE System Library (the Java environment you are using), a META-INF folder with a MANIFEST.MF file (this is meta-information about your project: what
is its name, its version, its dependencies...), a build.properties
file (how to build your project). MANIFEST.MF and
build.properties are text
files but when you double-click on them, Eclipse opens special editors.
- Set up the dependencies in your project:
- Open MANIFEST.MF, open Dependencies tab
- In Required Plug-ins, click Add... and add the following plug-ins: zephyr.plugin.core, zephyr.plugin.core.api, rlpark.plugin.irobot, rlpark.plugin.rltoys, rlpark.plugin.robot
- Save
- Writing the code to interact with the Create:
- Right-click on the src folder in your project and
then New->Class
- Give a name to your class. To be compatible with Zephyr, your class should also implement the interface zephyr.plugin.core.api.ZephyrRunnable
- Implement your
class using as a template the class
CreateIntroSessionZephyr - Don't forget to put your path to the serial port on line 15 (or close to this line)
- Right-click on the src folder in your project and
then New->Class
Running the project
- Adding some
meta-information to let Zephyr know what class it should start when loading your jar:
- Open MANIFEST.MF
- Open the tab Extensions
- Click Add... and select zephyr.runnable (if it does not appear: check your dependencies: you are probably missing zephyr.plugin.core)
- Right-click on zephyr.runnable, then New->client
- Click on the new client and in the Extension Element Details, in the field class, browse to select your class
- Save:
Eclipse created a xml file in your project, namely plugin.xml,
to indicate the extension you provide in your plugin
- Running your code with Zephyr:
- In Eclipse, go
to the menu Run->Run Configurations...
- On the left, create a new Eclipse Application by right-clicking on Eclipse Application->New
- Give a name to your configuration
- In Program to Run, in Run a product, select rlpark.plugin.critterview.crittergui
- Go to the tab Plug-ins, in Launch with: select plug-ins selected below only, then click Deselect All, then select for activation your project/plug-in (should be one of the first in the plugin list), and then Add Required Plug-ins
- Click on Run
- Note that your run configuration can directly be started from the icons on the toolbar
- In Eclipse, go
to the menu Run->Run Configurations...
Documentation